Install a virtual machine in Windows 10 with Hyper V
Here’s how you can install a full-blown virtual version of an operating system in a virtual machine using Hyper-V.
Check your PC for Hyper-V support through the Command Prompt
If your PC does not support Hyper-V, you can enable it through Turn Windows Features On or Off in Control Panel
Restart your PC, and then create a virtual switch on Hyper-V by opening Hyper-V Manager from the Start Menu
Create the virtual machine through the Hyper-V Manager and the New Virtual Machine Wizard
Applies to All Windows 10 Versions
Currently, it’s possible to run a number of Linux distros natively on Windows 10. However, these Linux environments are limited in the features and tools that you can use. In Windows 10, there are only three distros to choose from: Ubuntu, SUSE Linux Enterprise, and OpenSUSE Leap. All three distros rely on a command-line interface, so you’ll miss out on running any of the graphical experiences (GNOME, KDE, XFCE, or other Linux-based graphical applications).
To get a full featured version of Linux on Windows 10, installing your favorite distro (Linux-speak for “a distributor or distributed version”) on a second PC is always an option if you are fortunate to have one, but not everyone has one to spare. Luckily, you can just use your Windows 10 PC, it’s still possible to run a full-blown version of Linux by using a virtual machine (VM) using Hyper-V. Here’s what you need to do on Windows 10 to create a virtual machine using Hyper-V.
Enable Hyper-V on Windows 10
Hyper-V is a virtualization technology tool from Microsoft that is available on Windows 10 Pro, Enterprise, and Education. Hyper-V allows you to create one or multiple virtual machines to install and run different OSes on one Windows 10 PC. Having the correct Windows 10 version is not the only thing your PC needs; there are also hardware requirements:
64-bit CPU with Second Level Address Translation (SLAT).
Processor must support VM Monitor Mode Extension (VT-c on Intel chips).
4GB of memory at a minimum.
Here’s what you need to do to verify that your Windows 10 PC has Hyper-V support.
Open Start.
Search for Command Prompt, left-click the top result and click “run as administrator.”
Click Yes on the UAC prompt.
Type the following command and press Enter: systeminfo.exe
Under Hyper-V Requirements, If you see a “Yes,” your PC can run Hyper-V.
If the command displays “No” under Hyper-V Requirements, then your Windows 10 PC hardware doesn’t support this feature or you may have to enable these features manually in your system.
Now that you know your machine is Hyper-V capable, you need to enable Hyper-V. Here’s what you need to do:
Open Control Panel.
Click on Programs.
Click on Turn Windows features on or off
A Windows Features pop-up box appears and you’ll need to check the Hyper-V option. Be careful that Hyper-V Management Tools and Hyper-V Platform are selected.
Click OK.
After Hyper-V is enabled, you will be prompted to restart your Windows 10 PC to finish installing the requested changes. Restart your computer. Hyper-V is now enabled. The next step will be to create a virtual machine using Hyper-V. Now that Hyper-V is enabled and you’ve successfully added a virtualization layer to Windows 10, you’ll need to create a virtual machine (VM) for the Linux distro you want to use. In order to do that, you’ll need to create a virtual switch to connect the VM to the Internet. Here’s what you need to do next.
Creating a virtual switch
Use the following steps to configure a virtual switch on Hyper-V:
Open Start.
Open Hyper-V Manager.
Click on the Action menu.
Select New and click Virtual Switch Manager.
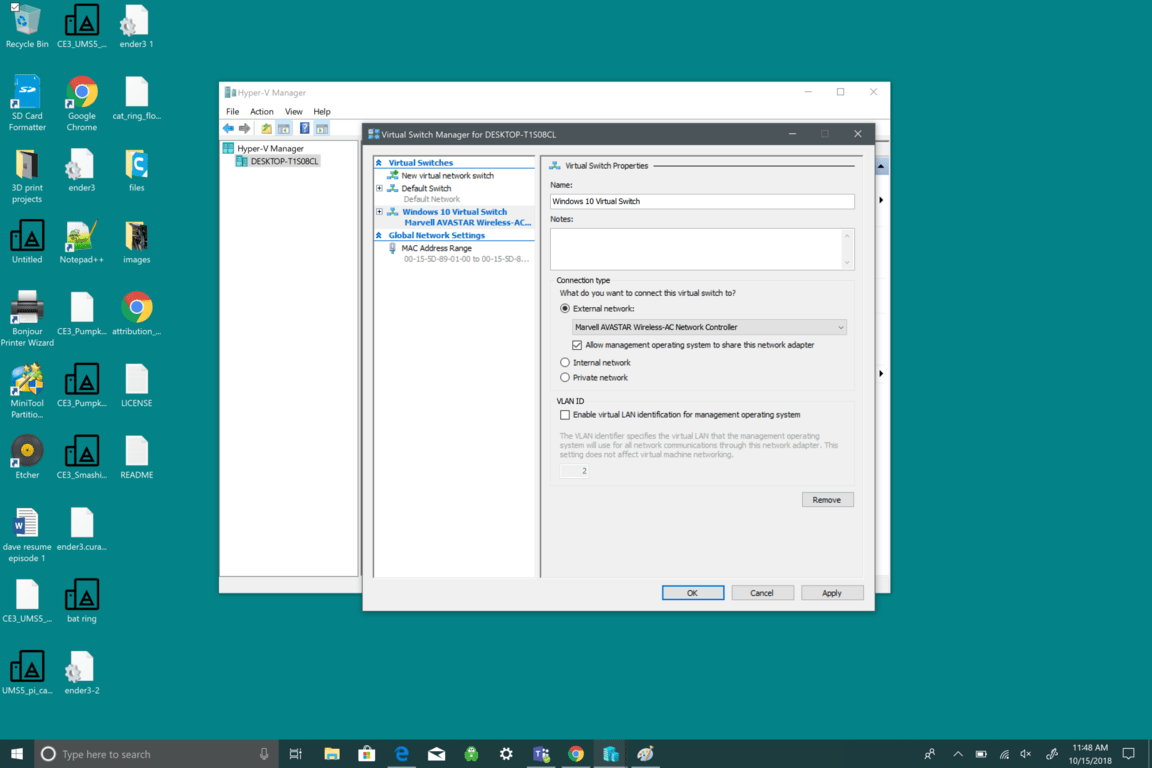
Next, you need to follow the highlighted items in the menu, as seen in the picture below. This will create a virtual switch. A virtual switch acts like an extra layer of security between your virtual machine and your Windows 10 PC.
Select New virtual network switch
Select External.
Select Create Virtual Switch.
Now, you need to customize your virtual switch. In this example, I used “Windows 10 Virtual Switch.” However, you can name your switch anything you want.
Enter a virtual switch name (e.g., Windows 10 Virtual Switch).
Under connection type, your network adapter should use the External network option.
Select OK.
Now that you’ve successfully created a virtual switch, you can create a virtual machine. The purpose of a virtual switch is to provide protection by using security measures to provide an extra level of protection between virtual machines. The virtual switch is an added safeguard in case anything goes wrong. Let’s walkthrough what you need to do to create a virtual machine.
Creating a Virtual Machine
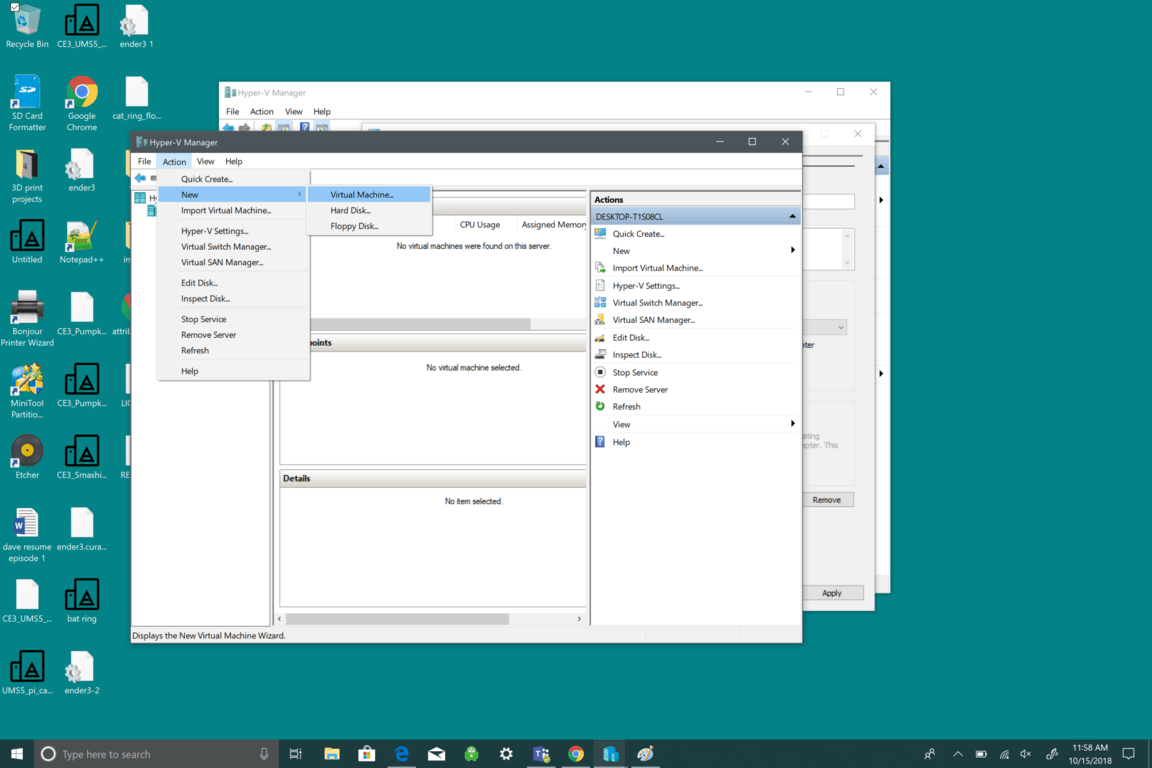
Open Hyper-V Manager
Open the Action menu
Select New and Select Virtual Machine.
Next, you will be taken to New Virtual Machine Wizard, which will walk you through the steps needed to setup a virtual machine in Windows 10 using Hyper-V. The New Virtual Machine Wizard is pretty straightforward and Windows 10 handles all the default virtual machine settings. All you need to do in New Virtual Machine Wizard is to follow the prompts.
The New Virtual Machine Wizard takes the guesswork out of any questions you may have seeting up a virtual machine. Setting up a virtual machine is a breeze using the New Virtual Machine Wizard. Windows 10 makes setting up a virtual machine fast and easy. Here’s all you need to do to set up the virtual machine:
Specify Name and Location
Specify Generation
Assign Memory
Configure Networking
Connect Virtual Hard Disk
Pick Installation Options
Summary
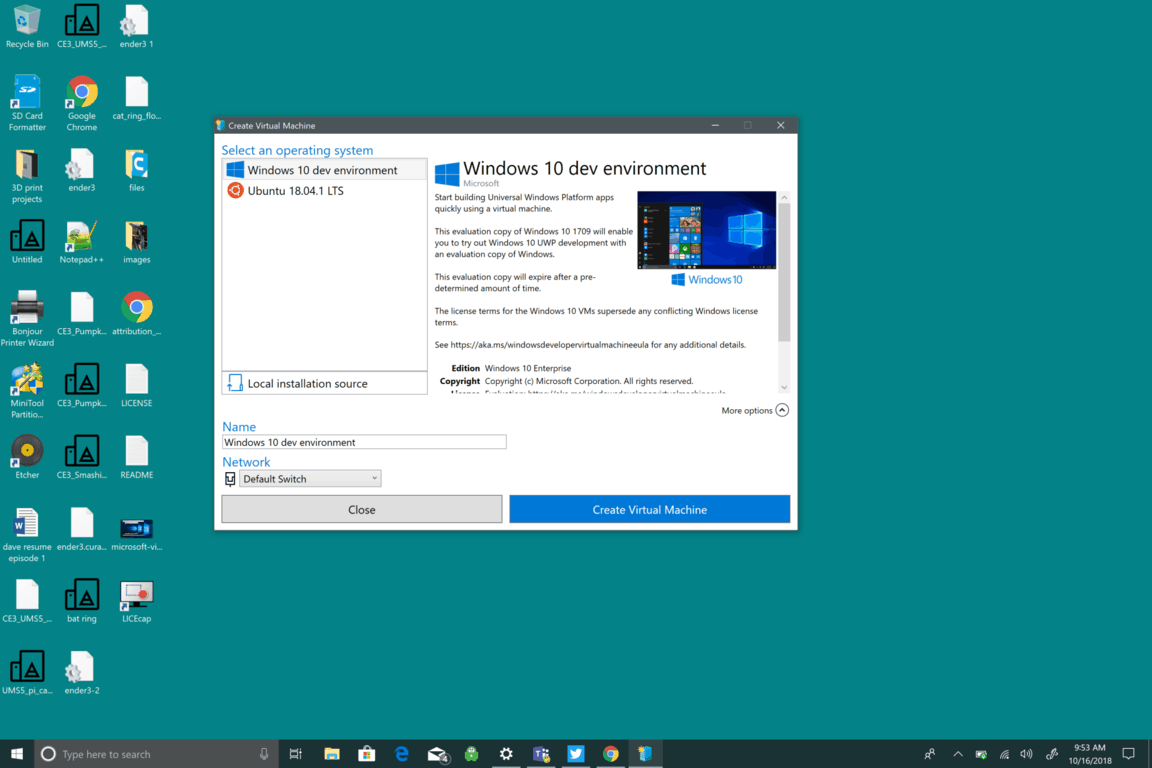
Depending on how you want to set up your VM, the New Virtual Machine Wizard will walk you step-by-step and let you customize your VM on Windows 10 using Hyper-V. In the Windows 10 Fall Creators Update, Microsoft made it even easier to create a VM with Hyper-V Quick Create. Now, you can create a VM using Windows 10 dev environment or Ubuntu 18.04.1 LTS. Quick Create can be launched independently of Hyper-V Manager and is a quick tool to use to create a VM in Windows 10.
Select an operating system or choose your own by using a local installation source; if you want to use your own image to create the virtual machine, select Local Installation Source. or Select Change Installation Source. Be sure to pick the .iso or .vhdx that you want to turn into a new virtual machine. If the image is a Linux image, deselect the Secure Boot option. Secure Boot is only for Windows 10 dev environment.
Select “Create Virtual Machine“
From there, Hyper-V Quick Create will create a VM for you without you needing to worry about it. Be aware that if you don’t have the OS already installed on your Windows PC, you will be required to download your preferred OS from within the Windows 10 app. You can also access Hyper-V Quick Create from the right pane within Hyper-V Manager.
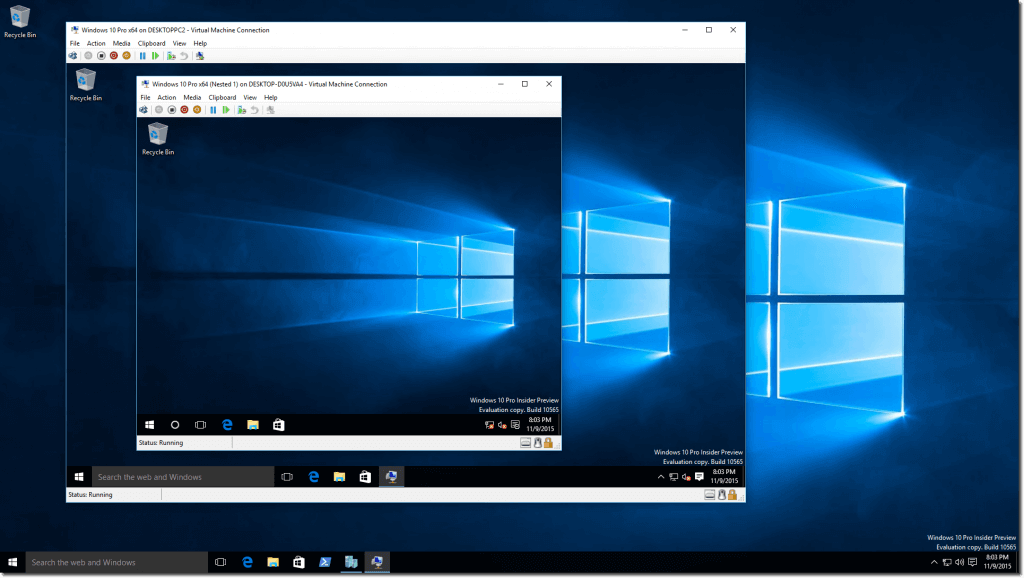
Once you’ve created a virtual machine, you should see a screen like this (if you used Windows 10 dev environment).
Obviously, Ubuntu and other OS welcome screens will have different welcome screens, but you will be able to successfully create a VM using Hyper-V Manager or Hyper-V Quick Create. Windows 10 is making creating virtual machines (VM) easier and faster than ever.
The Microsoft Dynamics 365 for Finance and Operations developer VM's have an 180 days Windows evaluation license. To check how much time is left, run the following command in a command prompt (running as administrator). slmgr -dli
To extend the evaluation period, run the following command. slmgr –rearm
Note that if the evaluation period is expired, and you don't extend it, Windows will shut down sporadically. This could cause issues if it's being shut down in the middle of an upgrade to a later version of Dynamics 365 for Finance and Operations or during other long running tasks. Since most D365FO VHD's available on LCS is more than 180 days old, it's a good idea to extend the evaluation period as soon as the VM is set up.
Also note that you can only extend the license a limited number of times. In order to see how many extensions rename, use the command below. slmgr –dlv
Press Enter on YES to save the settings and boot into Windows.
Enabling VT-x in ThinkCentre (Desktops):
Power ON the system.
Press Enter during Lenovo startup screen.
Press F1key to enter into BIOS Setup.
Navigate to the Advanced tab and press Enter on CPU Setup.
SelectIntel(R) Virtualization Technology, Press Enter, choose Enable and press Enter.
Press F10.
Press Enter on YES to save the settings and boot into Windows.
Sony
Sony VAIO: F2 or F3
Alternatively: F1
If your VAIO has an ASSIST key, try to press and hold it while you power on the laptop. This also works if your Sony VAIO came with Windows 8.
With the computer turned completely off, press and hold the Assist button until the black VAIO screen appears.
NOTE: The location of the Assist button will be different depending on the computer model. Refer to the operating instructions supplied with the computer for the exact location of the Assist button on your model.
At the VAIOCare | Rescue Mode screen, press the Down Arrow key until the Start BIOS setup [F2] option is highlighted, and then press the Enter key.
In the [BIOS Name] Setup Utility screen, press the right-arrow key until the Advanced tab is selected.
On the Advanced tab, press the down-arrow key until Intel(R) Virtualization Technology is selected and then press the Enter key.
Use the arrow keys to select Enabled, and then press the Enter key.
Press the right-arrow key until the Exit tab is selected.
Press the down-arrow key until Exit Setup is selected and then press the Enter key.
In the Save screen, verify Yes is selected and then press the Enter key.
Toshiba
Most commonly: F2 key.
Alternatively: F1 and ESC.
Toshiba Equium: F12
Turn ON the System.
Press F2 key at startup BIOS Setup.
Press the right arrow key to Advanced tab, Select Virtualization Technology and then press the Enter key.
Select Enabled and press the Enter key.
Press the F10 key and select Yes and press the Enter key to save changes and Reboot into Windows.
To enable Hyper-V on your computer. This can be done as follows:
Go to Control Panel -> Programs -> Programs and Features -> click Turn Windows features on or off -> check Hyper-V -> click OK.
In this post I will give an up-to-date overview of D365 Finance and Operations integration options, mentioning their methods of integration and advantages and disadvantages of every integration method compared to each other. I will also give you information and advices from my first hand experiences using them.
Topics
OData
Odata is an open source protocol to serve and consume interoperable data using common query operations with RESTful APIs. D365FO exposes all its public data entities as OData endpoints which can then be accessed using following URI format :
1
https://<d365fourl>/data/<dataentity>
OData provides a quick, codeless data integration method with many data query options and CRUD operations. You can use its open standard query string language to query your data and do data manipulations using standard Odata CRUD commands, all using just simple and open standard REST calls. If you would like to call a custom method within your data entity, this is also supported by exposing custom actions with your OData entities, so the commands are also extendable to a certain point.
You can definitely use OData for your own integration projects, but there are also many OData-Ready software available today, and these can directly be connected to D365FO Odata endpoints. Microsoft Power BI also supports OData connection and you can connect Power BI using OData if you feel lazy with setting up faster data integration possibilities methods, like Entity Store and Data Lake integrations.
Although it looks like the optimum way of data integration with D365FO, there are some drawbacks involved. OData queries and data operations are executed really slow and data reading may take ages if you try to retrieve a large entity. OData is mainly designed for simple CRUD operations and simpler queries. If you need to execute complex queries, like complex joins and lookups for example, you may start to hit its limits.. Although you can add some custom actions to extend available OData commands with your own ones, complex operations and business logic unfortunately do not go very well with it. It may be required to place this complex logic on consumer application if you decided to integrate it using OData.
There is also a rather new feature of D365FO to throttle calls to OData endpoints by giving priorities to them, to avoid system lockdowns that might be caused by frequent OData calls. You can read more about it from the link below :
This is by far the most flexible and customizable way to integrate with D365FO and the one I use mostly in my integration projects. Custom services are created with standard D365FO X++ code and can be used for both data based and operation based (posting stuff etc.) integrations, limit being just your imagination.
AIF services used in Dynamics AX are now upgraded to custom services in FO and they are automatically published into SOAP and JSON REST endpoints when deployed. However, management and monitoring tools used for old WCF AIF services are now disappeared, leaving just naked, not configurable services endpoints.
When you deploy a custom service, following endpoints are created and you can call them remotely using standard AAD OAuth authorization and SOAP/REST HTTP calls:
Data integration in custom services is done via data contracts which are then converted to XML or JSON depending on the endpoint. Performance of doing so is quite fast, compared to other data integration options since everything is handled with low level .NET commands. You can in theory transfer big amounts of data this way however I do not recommend doing so. With large data transfers you may hit some not-foreseen limitations and timeout problems on the way. But it is still possible to program some kind of paging mechanism in your service class to send small chunks of larger data to skip these limitations as well.
If you need to see an example, I have used a custom service in my previous Android integration blog post, and X++ code of this service is available in my github page:
The throttling mechanism we mentioned in OData topic can also be used for custom service endpoints.
If you need to do management and monitoring of your custom service, or configure some custom authorization methods instead of AAD, there is a possibility connect it with Azure API Manager and empower its monitoring and authoring abilities, as described in my another blog post :
DMF allows you to import and export big data in D365FO using various source/target data files and services. This is the recommended way of data integration in D365FO if you need to transfer large amounts of data from other systems using supported file formats and services. It supports also incremental data load/export with change tracking and a data staging feature for post data validations and processing.
Import and export projects are processed using “data entities”, which are normalized views of D365FO data tables and can be added programatically if necessary. There is a dedicated Data management workspace which you can setup data import and export projects, import actual data or see available data entities and check integration mappings in graphical schemas. However useful it is, I cannot tell you that the DMF UI is an user friendly one. Some parts of the “advanced” and the “standard” views are confusing to users, even to developers. Also field mapping and Unicode setup parts are confusing and do not always work as expected.
There is support for every old file format which was supported by Dynamics AX before, and some new formats and SQL Server DB connection options are available, but there is still no support for modern data transfer file formats like JSON, Parquet, ARRF, Avro etc.. Also as package options you can only use ZIP compression and there is no support for GZIP which is widely used for data transfer today. To transfer the data inside a file, CSV files are the recommended option. As you can see in the analysis below from luminousmen.com, a CSV file is quite an outdated file format and falls far behind on every aspect compared to modern data transfer file formats.
DMF has REST APIs and Azure actions to import and export data from outside D365FO. You can find Azure actions to be used in Logic Apps under the “DataManagementDefinitionGroups” section of “Execute action” :
You can find example code (and logic apps) for data import and export using DMF in the Dynamics-AX-Integration GitHub page. However; If you expect a straightforward way of using these API commands to export or import your data, you will be disappointed.. For example for importing a CSV file, you need to create a ZIP file package containing the file you want to import and add fixed Manifest and Header XML files in it,.. then place it in a temporary container DMF provides for you, import it using another action and then use an infinite loop for checking if the import is completed successfully or not, and then try to get the actual error checking various DMF actions to inform the user about the problem that occured..
There is currently no other direct file import or export method available, you need to zip it with those fixed Manifest and header files (which you also need to store in a fixed location) and setup workflows in the example code to import them. It would be very nice to have one straightforward option in the future though, that receives the data file as input and consolidated error and log messages as output..
Another thing to mention is running import jobs in parallel; if you call two APIs in parallel importing into the same data entity, you get errors and problems with it, although it is possible to execute such action using async DMF API methods, or async processings in logic apps etc. Also the table you need to export should not have any locks on it, or you run into some nasty problems.
ADVANTAGES
Suitable for big data integration
Incremental data import/export possibility
Staging tables for post data validation
DISADVANTAGES
No support for modern big data formats
UI is not user friendly and confusing
DMF API’s and Actions for integration from outside D365FO are not straightforward and practical
Table lock problems, parallel executions will fail for the same data entity although async import like this is possible
Recurring integrations is a D365FO data integration platform based on DMF and data entities, providing automated data exchange possibilities between third party data providers. Once setup, Recurring Integration platform REST API’s can be used by third party integrators to import/export data from and to D365FO.
Recurring integrations feature can be enabled from a single button click in a DMF project and later can be managed/monitored from D365FO RI admin forms. REST API’s then used to push and pull data generated by this recurring integration, which can then be picked up in an ordered and scheduled way. These API’s used for recurring integrations are fixed and you cannot extend them for custom functionality.
ADVANTAGES
Complete, stable integration platform with useful features like importing data in a sequence and skipping empty files etc.
Fully automated and scheduled way of integration
Unlike DMF API, both data file import and package import options are available in the API
D365FO business events feature allows you to send notifications of FO business events to Azure event handlers and trigger based workflow providers. It comes with many out-of-the-box FO business events plus provides you the ability to create new ones with X++ programming. You can send notifications from these events to Azure endpoints like Service bus, Event hub, Event grid and Logic apps (or Power Automate), also to custom HTTPS endpoints using standard http methods. It is also possible to subscribe a business event directly from Logic apps or power automate using “When a business event occurs” trigger, as shown below:
It is also possible to attach small amounts of data to the notifications using message payload, however I would advise you to be really careful with that since attaching large amounts of data to your payload will not only create all sorts of problems, it will also ruin the lightweight operation expected from a notification service.
If you need more information, I have a complete blog post about business events, describing also how to create a new event using X++:
ADVANTAGES
Realtime integration with event based Azure services and custom HTTPS based services
Trigger methods available for logic apps and power automate
Many get surprised when they hear D365FO is not really a SQL Server based software and its database logic and metadata are not directly accessible via SQL server. D365FO, in other names Axapta or AX, stores its metadata, record id mechanism, data type information and data relations in its own kernel and uses SQL server only as a bulk storage, which is then not directly readable by third party applications and analytics software. Dinosaurs like me would explain the reason for that as the ancient Damgaard Axapta was designed to be a “multi-database” application and supported Oracle DB as well as SQL server as a database options. So in that time, it was a decision to keep these metadata in the kernel instead and make it easier to switch databases if needed.
So; to be able to publish normalized, third party readable SQL server data from D365FO, we need to use “data entities” and “aggregate measures” for data normalization and export their content to another SQL server database using the “Entity store” and BYOD functionalities. Entity store option publishes aggregate measures (start schema of data entities)(cubes, sort of) of D365FO in a separate SQL server database (AXDW) which can later be read by Azure analytical software (Power BI) to run analytical reports.
Entity store data can be updated manually or using batch jobs. As necessary, there is also an option to develop custom aggregate measures using D365FO development tools. As you can guess this integration is read-only and in fact currently only available to MS Power BI. The reason is, in D365FO production environments, this AXDW databases are not accessible to end users, and you cannot get authorization for any other third party app if you need to use the same database for your own purposes.. BYOD on the other hand, which we will mention in the next topic, makes this possible by exposing data to a user database instead.
ADVANTAGES
Faster way of providing analytical data to Azure reporting tools
BYOD allows you to export entity data to a user created SQL Server database instead of the Entity store AXDW, which is currently not allowed to be accessed by end users in production environments. Using BYOD you can export D365FO data entities to your database manually or with batch update or change tracking options using the standard DMF export projects page. To start using BYOD, you need to configure your SQL Server database in the “Data management” workspace “Configure Entity export to database” tile:
Then you can use the Publish button to create SQL tables for selected data entities in the target database. After these steps are completed, you can export the data to your SQL database using DMF export jobs and selecting your BYOD SQL Database from the list as a target.
ADVANTAGES
Data can be exported to and accessed from user created SQL server databases
Exporting table data using query filtering is possible
Incremental updates with change tracking are supported.
A feature still in public preview, Azure data lake publishing provides a more practical, cheaper and faster storage option for your big analytical and integration databases which you used to access using Entity store or BYOD options before. It can publish data from entity store, data entities and standard FO tables to a “Data Lake Storage Gen2” storage, in a “near real-time” speed using the new D365FO “Data feed service”. This new data feed service works faster and saves you the hassle of maintaining DMF export jobs and batches.
Publishing your data into a data lake storage brings in many benefits. It costs much less to store data in Data Lake compared to a SQL Server data space in Azure. Plus data lake allows you to combine your FO data with data from other applications, and also CDS inside the same data lake space and run consolidated reports with them. Data lake supports Common Data Model folder structure which can be understood by many Cloud applications and services, and it is also possible move the data from and to CDS using CDS Data lake integrations. Usage of Azure data transformation tools like Azure Data Factory is also possible.
All in all, it brings you a couple of steps closer to Azure cloud integration and provides you the future proof “near-real time” data synchronization.
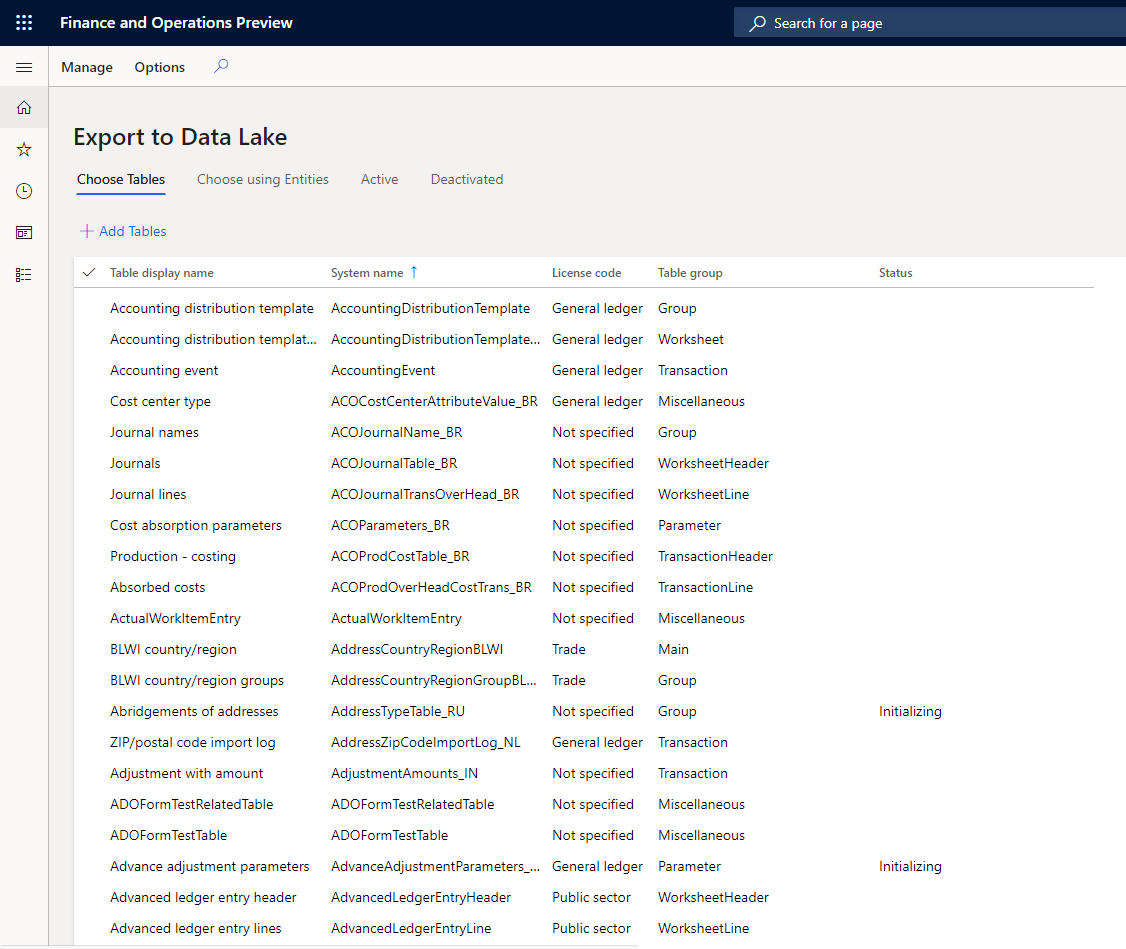
In the time of writing, Azure data lake options is still in public preview and needs to be enabled from D365FO “Feature management” window first. Then you will be able to choose tables to be published to data lake from “Export to Data Lake” form and push Entity Store to Azure data lake from the Entity store window:
ADVANTAGES
Reduced data storage costs compared to SQL Server storage used by BYOD or Entity Store options
Near-realtime data integration with automatic data feeds
Improved integration with many Azure cloud apps and services using Common Data Model
Possibility of using Azure data transformation tools like Data Factory
Dual write, one of the newest integration features of D365FO, provides a near-real time, tightly coupled and synchronous data transfer between D365FO and CDS. CDS sits at the heart of Microsoft Power Platform and used by many MS applications (also called model-driven apps). Dual write will eventually make it possible to synchronously integrate D365FO with other software in Dynamics 365 package and power platform components.
Any data written to D365FO dual -write data entities is written directly into its CDS couple in near real-time speed, and similarly the other way around. Real time data synchronization process has “Running” and “Paused” mode options, and can cache write operations in offline or paused mode to be executed afterwards.
At the time of writing, dual write setup can be done via LCS and from the Data management module section below. However, I will not get into details of the setup since it is subject to change in short term. Once setup, you first need to do an initial sync for the entities, then you can start using them in the real-time sync mode :
Dual write feature is just out of its “public preview” and released for general availability in PU33. In my own tests in the current release the “near real-time” part had some delays and glitches. Another thing to mention is the data schema differences between CDS and D365FO. CDS is using “Common Data Model”, which has quite simple schemas for its master data tables, on the other hand D365FO can have quite complex data structures like trade agreement and pricing modules or directory and party structures for storing contact information and addresses. So it is quite challenging to keep two different data structures in harmony with each other, and MS is working on some unified data models to achieve that. In the release version some of the out-of-the-box mappings of these complex areas are not complete or do not match with CDS; But Dual write is just a very new feature which MS still invests on and it will surely improve in time.
ADVANTAGES
Tightly coupled near real-time integration with power platform and model-driven apps
Online and offline modes
Queries and filters for data integration
Ability to customise field-entity mappings
Pausing possibility
DISADVANTAGES
Room for improvement in “near-real time” performance
Mappings of some data models not complete or do not match each other yet
In addition to the standard integration features of D365FO, there is also a possibility to integrate by consuming external web services (or Azure services) within D365FO. To be able to do that, we need to use .NET libraries and functions to call the external web service within D365FO.
In the past I was able to do that using only X++ code and standard CLR-Interop features of AX, but nowadays, web service technologies are evolved and the libraries and functions to call them get much more complex. So I recommend you to build a seperate .NET library for your external call to avoid hitting some limitations you might experience with CLR-Interop (like async features and so) with using your new .NET service call functions. In D365FO, you can easily add .NET libraries to your VS solution and reference them to your X++ projects in the same solution.
The web service you are trying to access might also be operating in async web service mode. Async web services are special ones that do not wait for its operations to complete, but respond immediately with an 202 Accepted response and queue your request for later processing. Afterwards you need to inquiry if your operation is completed or not from your caller code. So they have quite different method of calling compared to legacy web services.
Also the authorization methods nowadays are a bit more complicated, like we know the OAuth from Azure services. You may write a .NET library using Microsoft sample code with OAuth but it may go outdated afterwards and you may need to update your library reflecting the changes (happened quite often to me). Therefore, as you see things nowadays are a bit more complicated with web services and I not only recommend you doing your REST-Web service calls in .NET libraries but also recommend using a good, maintained open source service call NuGet package to do so, like “Service stack”, “Restsharp” or “Flurl”.
Once your library is complete and connected to your X++ class, you can use standard X++ calls to retrieve data from the external service, or put it in a batch and do scheduled calls.
Unfortunately, I do not plan to post an example library for that topic in my blog because the methods used for doing web service calls evolve rapidly and such examples and blog posts get outdated in no time. But further questions, you can leave in comments below and I will try to answer them.
ADVANTAGES
High performance, direct calls with external services using low level .NET commands